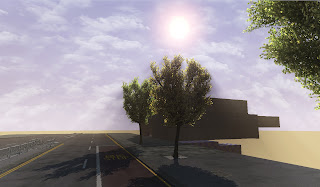
First step was to make High poly leafs. Seems a bit much to go to so much detail, but it was the only way to achieve the result I wanted.
Two variations of branches were made and then the leafs were attached to them. This job was made easier using the paint objects tool in Max. It was set up to randomly use the four leafs I had made and then as you painted onto the branches it would paint on the leafs. Because I had placed the pivot points at the base of the leafs it was easy to rotate and scale the leafs at then end. This stage was important because having leafs that were rotated towards the plane and away from it would create the best possible normals when the textures were baked from them.
The trunks and branches or the main tree were crated in the same way as when we did in the first year project. Splines were created and a master branch was then created and copies of that branch were then attached to the splines to follow them.
After crating the the Alpha planes for the branches it was important to scew the shape of then so that they could be seen from all angles. If they were flat planes, from the sides they wouldn't be seen and this would make the canopy look very thin and unrealistic. Small four side branches were made to attach the branch planes. I decided to crate two variations.
To create the canopy the branch clusters were then attached to the splines. This was done in the animation tab. With the pivot points properly aligned this made placing and rotation the clusters very easy. The best thing is I also plan to make variations of the trees and I can use this as a master tree. By just moving the splines around the large trunks and the leafs will follow them around.
The reason form making more trees would be to have variation in the silhouette as I plan to have a row of trees all the way down the street and it's important that all the trees look different.
The Normals for the canopy were corrected by using a script the comes with speed tree. This makes the normals project out in a sphere around the canopy. Then based around the shape of the canopy the centre point is moved into the correct place at the centre of the tree. This is important and the light will reflect properly when the tree is ingame. Shadows will be deep within the tree and highlights from the specular values will hit the silhouette of the leafs.
In order to get the trees to react properly with the wind it was important to get the vertex colours painted on the leafs. a gradient from black to red was painted so that the end would move with the wind and the branch at the bottom would stay stationary. Red was then used in the material editor so the material would know how the leafs would react to the wind editor.
For the wind portion of the material, sign nodes were used to create waves across the leafs to simulate the wind. This was then referred to the wind actor used in the scene to specify the direction and the strength of the wind.
Two sign networks were added together. One short and aggressive, and one long and smooth. this added more variation to make the effect more realistic. It's possible to add more to add further variation but I felt this was enough and I didn't feel it was necessary to add more instructions to the material.


No comments:
Post a Comment